To integrate the etracker code into the eCommerce platform Shopify, neither a special plugin nor an additional app is required, because the code can be integrated very easily into the shop and the check-out process.
Take the following steps to analyse your shop consent-free and in compliance with the GDPR in the blink of an eye:
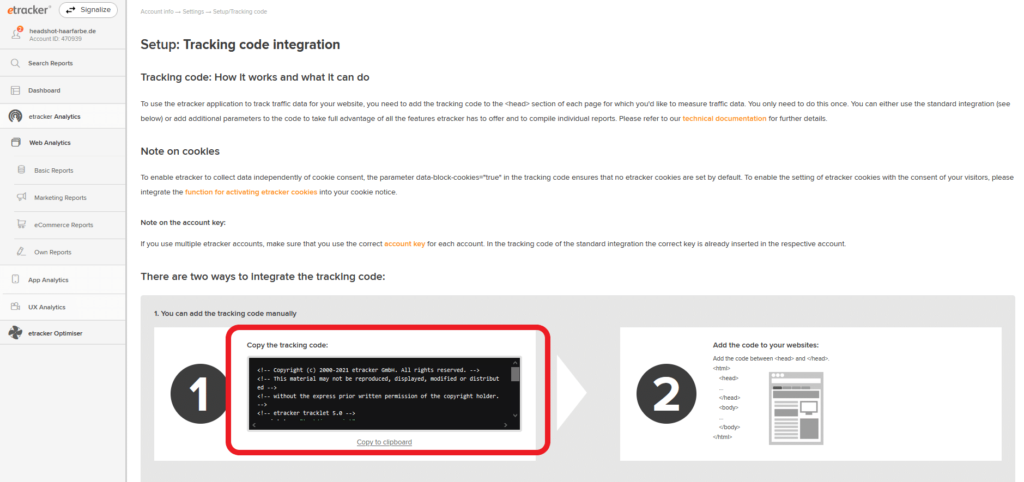
1. Login to your etracker account. Under Settings → Setup/Tracking Code you will find your etracker tracking code, which you copy.
2. Now log in to your Shopify shop at https://accounts.shopify.com/store-login.
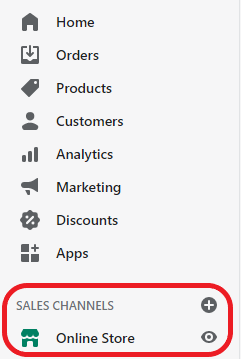
3. Open the Online Store menu item under Sales channels.
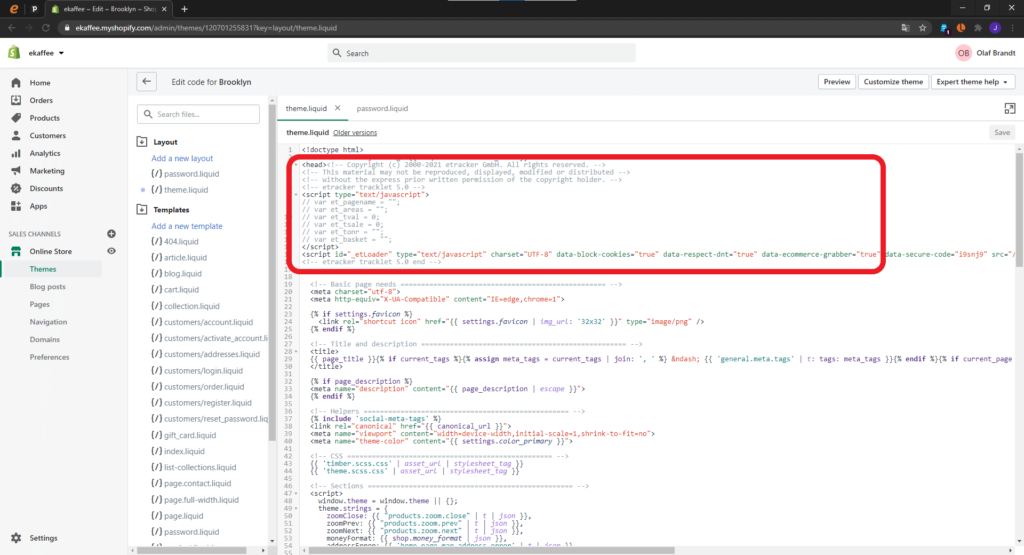
4. Go to Themes, and select first Current theme, then Actions, and then Edit Code.

5. Under Layout, select the file theme.liquid and integrate the copied etracker tracking code between the opening and closing head tag.
6. Now add the parameter data-ecommerce-grabber=“true“ to the tracking code.
This is how the tracking code is complete:
<! – Copyright (c) etracker GmbH. All rights reserved. – >
<! – This material may not be reproduced, displayed, modified or distributed – >
<! – without the express prior written permission of the copyright holder. – >
<! – etracker tracklet 5.0 – >
<script type="text/javascript">
// var et_pagename = "";
// var et_areas = "";
// var et_tval = 0;
// var et_tsale = 0;
// var et_tonr = "";
// var et_basket = "";
</script>
<script data-ecommerce-grabber="true" id="_etLoader" type="text/javascript" charset="UTF-8" data-block-cookies="true" data-respect-dnt="true"
 data-secure-code="Your individual Secure Code" src="//static.etracker.com/code/e.js"></script>
<! – etracker tracklet 5.0 end – >
Your individual Secure Code is a placeholder for your individual Secure Code.
By clicking on Save the modified theme including the tracking code and the tracking code will be displayed on all shop pages.
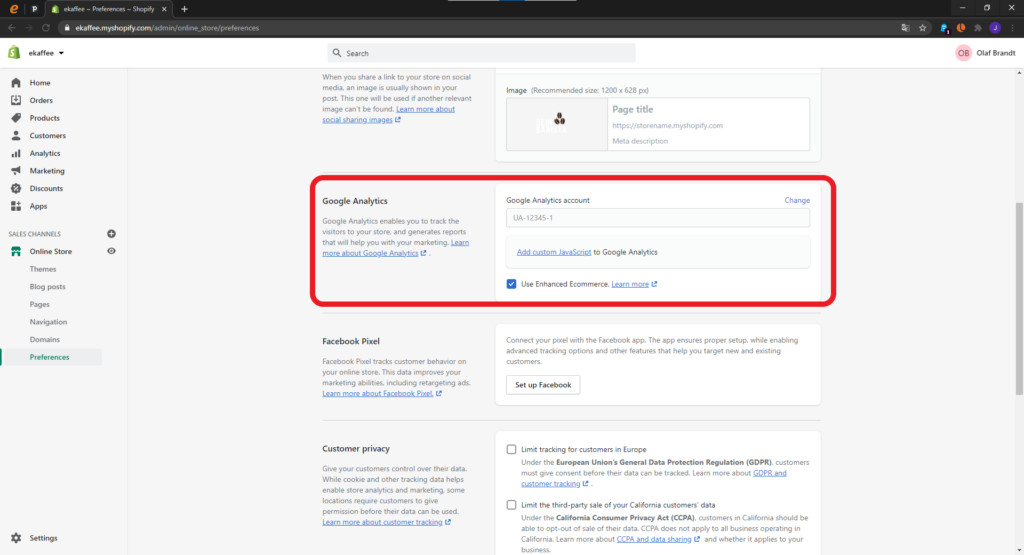
7. To activate the extended eCommerce tracking, integrate a modified Google Analytics code under Preferences in the section for Google Analytics so that the check-out process is also measured with etracker Analytics.
The inserted code could look like this:
<!-- Google Analytics -->
<script>
(function(i,s,o,g,r,a,m){i['GoogleAnalyticsObject']=r;i[r]=i[r]||function(){
(i[r].q=i[r].q||[]).push(arguments)},i[r].l=1*new Date();a=s.createElement(o),
m=s.getElementsByTagName(o)[0];a.async=1;a.src=g;m.parentNode.insertBefore(a,m)
})(window,document,'script','https://www.etracker.com/analytics.js','ga');

ga('create', 'UA-12345-1', 'auto');
ga('send', 'pageview');
</script>
<!-- End Google Analytics -->
After saving, the configuration entry should look like this:
8. In the etracker application under Settings → Account → Data protection notice and right to object, you will find the entry to supplement your data protection notice. Please note that the objection slider contained therein is provided with your shop URL and is displayed as an html element:
<a href="#" data-tld="yourdomain.com" id="et-opt-out"></a>
Yourdomain.com is a placeholder for your URL.
Optionally, etracker cookies can be activated via a consent banner. Please ensure that the Consent Management does not block the display of the etracker code and the modified Google Analytics code, including eCommerce tracking. Further information on this can be found in the guidelines for Consent Management Tools.