Reporting makes automatic sending of individual web analysis reports or individually compiled report sets possible via email. Alongside the joint user access to the application, customers, bosses, colleagues or agency partners can be supplied with the information they need on a regular basis. The selected report sets can be viewed for download at any time at the touch of a button.
An overview of all email reports and the reporting configuration can be found in the administration section or via the layer which opens when you click on the account information.
Reporting Configuration
Select Account Info → Reporting & Exports → Create Reporting in order to send selected reports as needed daily, weekly, monthly, quarterly or even yearly. A selection of formats are available including CSV, XLS, XLS zipped, XML, XML for Excel and PDF.
Tip: If you wish to export reports with multiple segments (for example, top pages by device type or geo origin), please select an open file format as the fold-open function for the segmentation is not transferred with PDF exports by default.
The creation process includes the following steps:
1. Selecting the Type (File Format) and Title
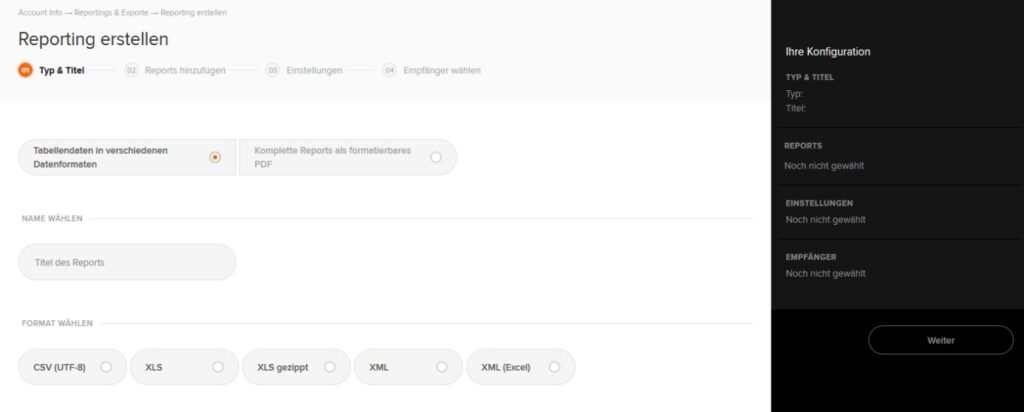
Tip: Select a title which describes the contained reports as well as possible. For technical reasons, with reports and report sets for Excel, no title information can be entered into the table sheets.
2. Selecting Included Reports
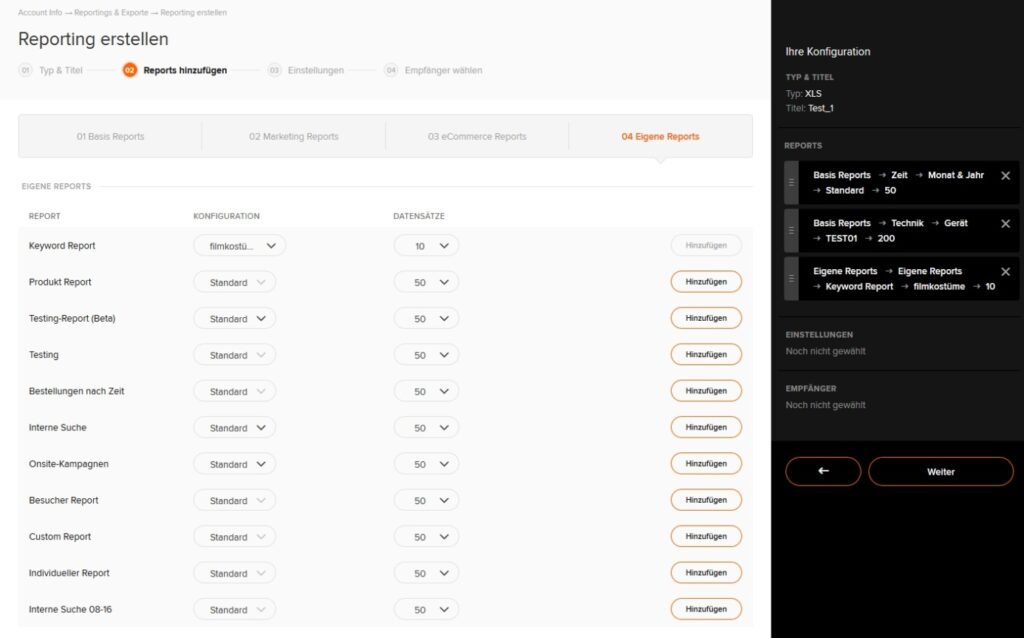
Separate emails for each report are impractical and annoying. For this reason, you have the option with etracker Analytics to combine multiple reports in different configurations into one report and to send it together in one file. In Excel, you can find the different reports as individual tabs. Reports from all Web Analytics areas, that is, basic reports, marketing reports, eCommerce reports and your own reports, can be selected. In addition, you can save different report configurations to the respective reports, that is, with individual segmentation, sorting, filtering and key figure selection, before using it in the report. The number of data records for the report distribution can also be set if you only wish to view the top 100 keywords, pages or areas.
3. Selecting the Distribution Interval

Set if the report should be sent daily, weekly, monthly, quarterly or yearly. The period for reporting currently corresponds to the selected distribution interval. The option to set deviating period ranges is already prepared.
4. Selecting Recipients
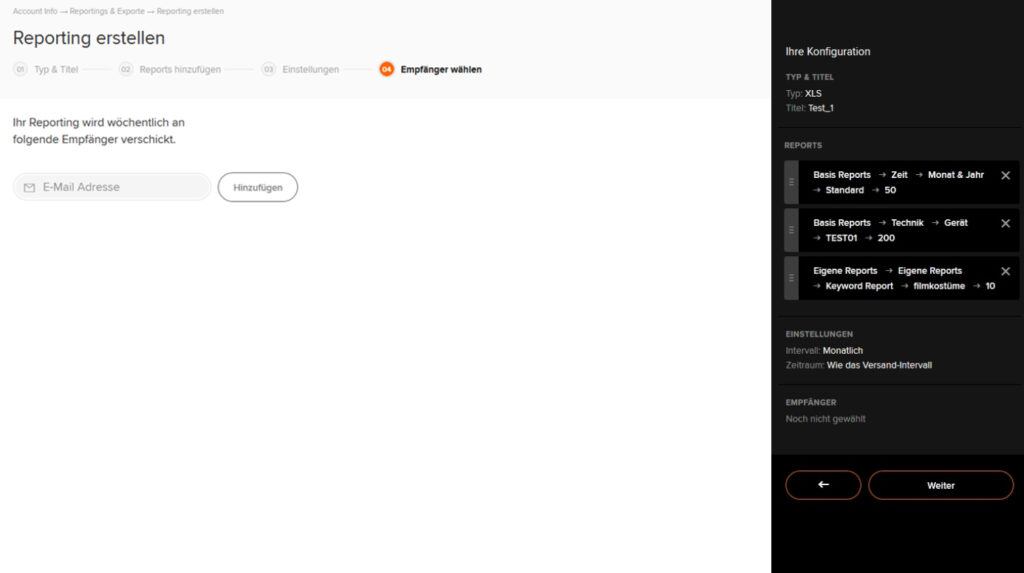
Now all that is missing is the recipient information in order to complete the reporting configuration. Click on Create to activate report sending.
Reporting Overview
You can access the overview of all created reports with their respective dates of creation, names and distribution interval via Account Info → Reporting & Exports → Existing Reports. By clicking on the icons in the Actions column on the right, you can download the reports as files as well as change or delete them.
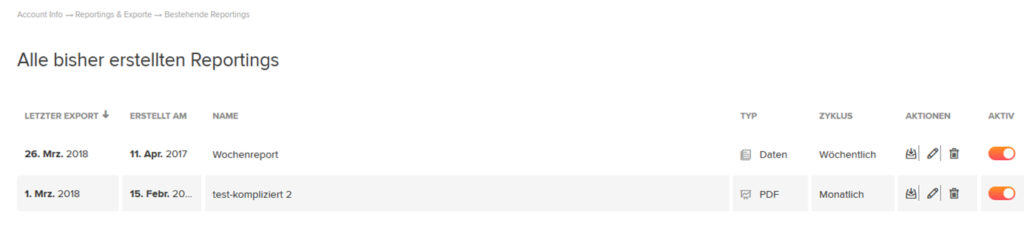
Note: To date, the order of the reports in the file has been specified using order selection.